PART ONE - Install
- Extract the zip file and run the DCAgentSetup_x64 installation file.

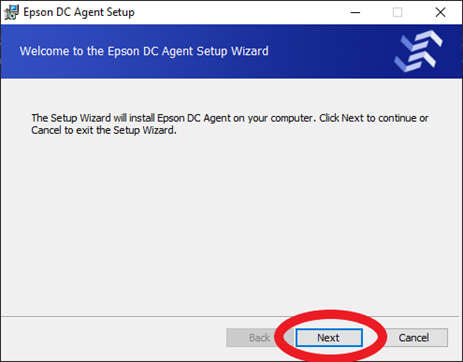
- Click the “Next” button.
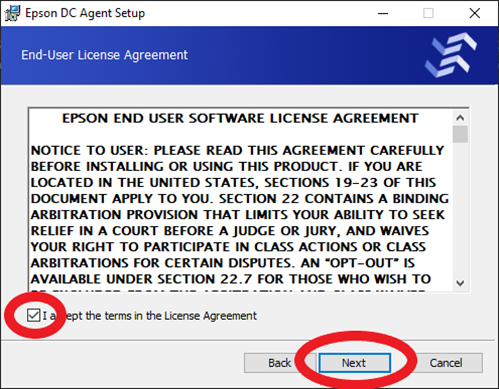
- Check the box to accept the license agreement and click the “Next” button.
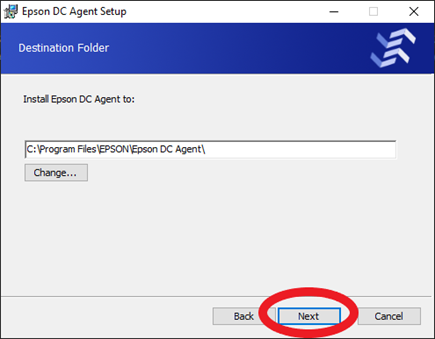
- Click the “Next” button.
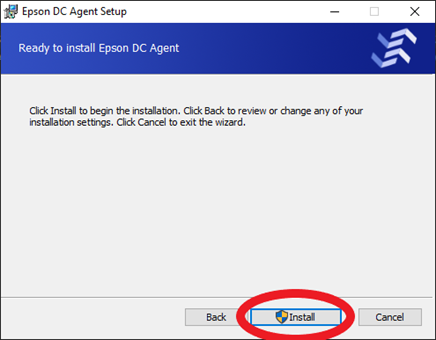
- Click the “Install” button.
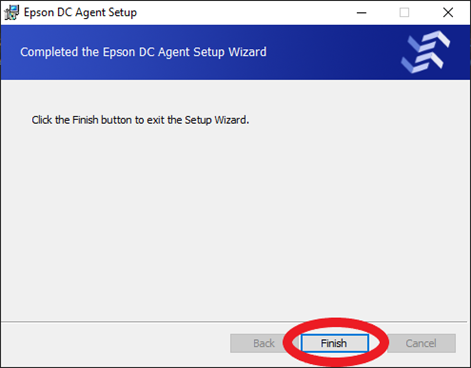
- Click the “Finish” button.
PART TWO - Configure
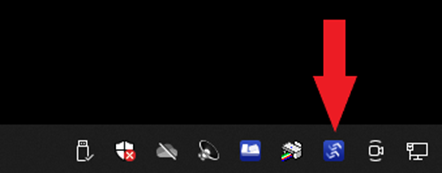
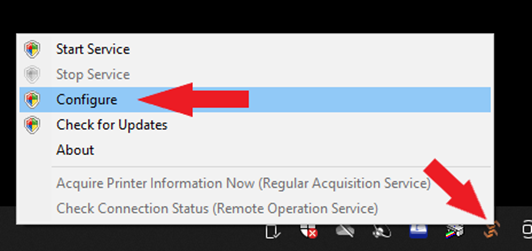
- Right click on the DC Agent icon in the system tray and click “Configure”.
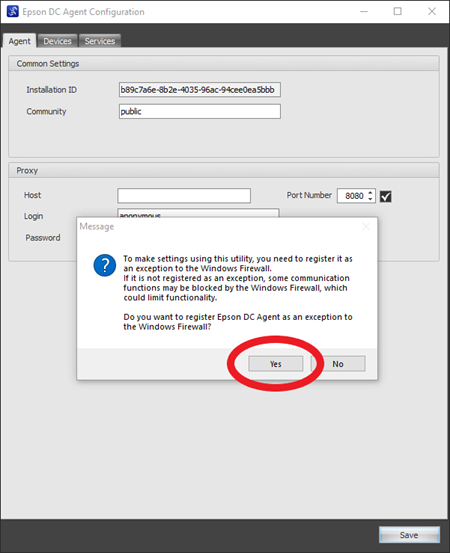
- Click “Yes” to make an exception in the Windows Firewall settings.
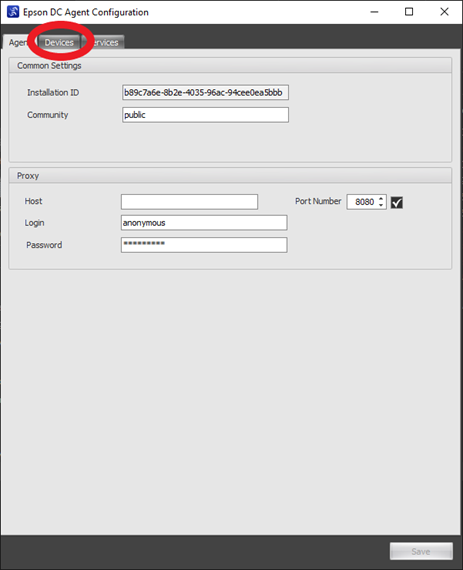
- Click the “Devices” tab.
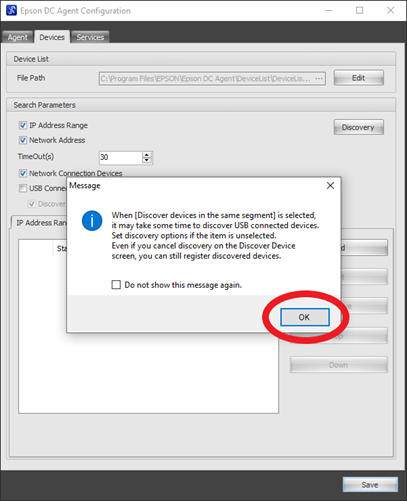
- Click the “OK” button to dismiss the message box.
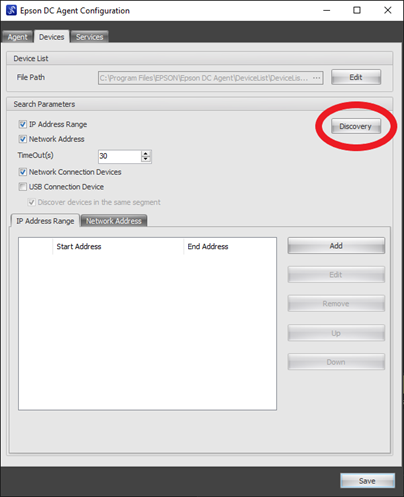
- Click the “Discovery” button.
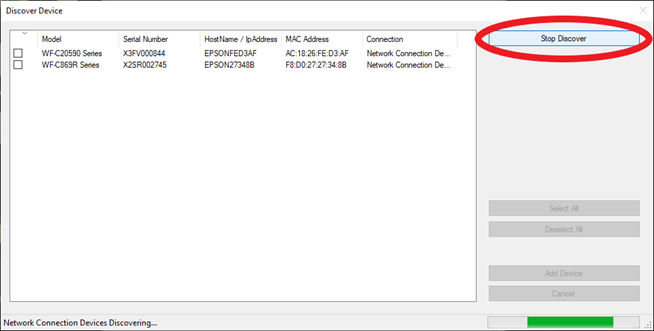
- Once all the Epson devices have been found, you can click the “Stop Discover” button.
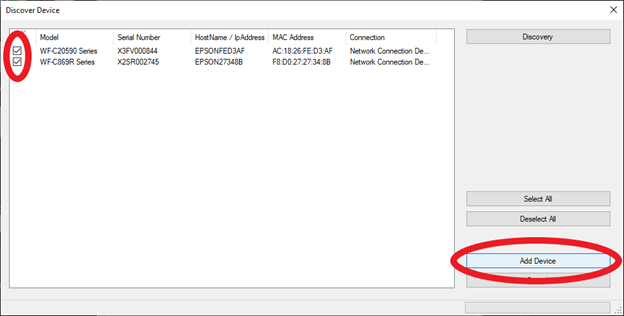
- Click the check box next to all the Epson Devices you would like to add, and click the “Add Device” button.
- Click the “Save” button.

- You should now see the icon in the system tray has turned blue.